You read that right, I built a gaming PC, and it wasn't that hard
Have you ever wanted to upgrade or even BUILD your own PC, but think its too hard? I have news for you, it isn’t that bad. If you have ever played with Legos as a kid and can operate a screwdriver and read some directions, you can build a computer, from scratch, with the exact parts you want.
Now, I’ll be honest, this was not my first PC build. I built a lower-mid range Gaming PC probably over 15 years ago when I was in high school, and upgraded that PC about 5 years ago. That PC was really starting to show its old age component wise, and sounded like a jet engine sure to old parts and years of use and dust. Pictures of the original build are below.


That brings us to my new PC build
For my new computer I wanted to build one that was a true high end gaming rig but, I didn’t need to be on the complete cutting edge of PC gaming technology, I went a few steps back. Outside of performance, I wanted my PC to run all games out now at near ultra settings at 1440p resolution, my other criteria was that it had to look cool. I wanted a case with a tempered glass side (so I can see in) and a bunch of RGB components and fans.
It had been a while since I had built or upgraded a computer and I wanted to see what was out there and what had changed. I did what any normal person would do and I stated Googling things about building computers now. I did know some of the basics, like that I wanted to go standard with all sizes, so a mid-sized case, and a standard ATX motherboard. The components themselves mostly came from lists that people much smarter then me had assembled.
There are a plethora of people who are employed by media companies like PC mag, or other PC information sights, that build and compile data on all the parts, build all different PCs, compare them, and put build lists together depending on what you are looking to accomplish. I knew my end game, I let me budget be flexible, and I started reading. I read list after list of different builds and reviews on parts, both the ones I was thinking of, and the ones above and below them on the performance scale. I’ll put my list below and explain a little bit of why I chose it.
My PC Build List:
- Cooler Master MasterCase H500 ATX Mid-Tower w/ Tempered Glass Side Panel
- GIGABYTE Z390 AORUS Ultra
- Intel Core i7-9700K
- Samsung 970 EVO SSD 1TB – M.2 NVMe
- G.SKILL TridentZ RGB Series 16GB 3200 (2x8BG)
- CORSAIR RMX Series, RM850x, 850 Watt, 80+ Gold Certified, Fully Modular Power Supply
- GIGABYTE GeForce RTX 2070 Super Gaming OC 8G Graphics Card
- Cooler Master MasterLiquid ML240R Addressable RGB Close-Loop AIO CPU Liquid Cooler
- HyperX Fury S Speed Edition – Pro Gaming Mouse Pad
- Razer DeathAdder Elite Gaming Mouse: 16,000 DPI Optical Sensor – Chroma RGB Lighting
- Razer Cynosa Chroma Gaming Keyboard
- ARCTIC MX-4 – Thermal Compound Paste
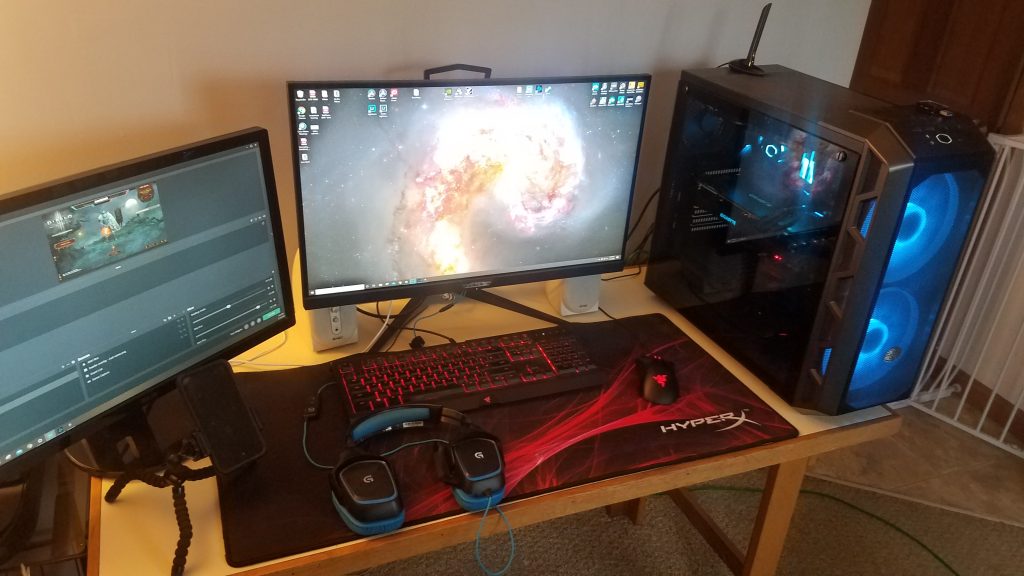
Here's what it looks like all put together!

Reasoning behind my choices
- Case: I went with this case because it checked all the boxes for what I needed and wanted and it was a reasonable price. It had the tempered glass side, it had aRGB fans in the front that worked with my mother boards RGB fusion, and it fit all my components.
- Motherboard: I went with this board for a few reasons. It was a solid gaming motherboard that offered WiFi and Bluetooth built in, all the slots I needed, RGB, and other features like easy overclocking and such from the BIOS.
- Processor: I went with the 2nd rung processor as I did a bunch of research and the Intel I-7 9700k bench marked about the same as the Intel I-9 9700k giving me the performance with a little less cost.
- Graphics: This one tore me up. I chose the Nvidia RTX 2070 Super Windforce made by Gigabyte. I ended up on this card as I was shooting for 1440p output on a gaming monitor that refreshes 120-144 times a second. If I was sticking at 1080p for my monitor I probably would of stepped down to the RTX 2060 Super, or if I was going for an extreme high end PC for 4k gaming I would of stepped up to the RTX 2080 Super or RTX 2080 TI.
- Hard Drive: This is one place where I did go closer to the cutting edge. The NVMe M.2 drives are a solid state drive that are just a little bigger then a standard thumb drive. They fit right onto the motherboard, and are lightening fast. I wanted to be able to boot into windows, in seconds, and have my games and programs load almost instantly, which this helps provide. My motherboard has 3 places for them so I can add more if I need them in the future, but I went with a 1Tb so that should be find for most people.
- Power: I chose this power supply because it was a great value from a reputable PC component company. It also had some head room in the wattage should I want to upgrade my graphics or processor in the future, requiring more power. This was also a modular unit so I would only have to plug in the wires I needed, making for a cleaner case.
- Memory: This ram was more then fast enough for me, and I have the option for upgrading or adding more sticks in the future to increase RAM capacity. It was also RGB that worked with RGB Fusion.
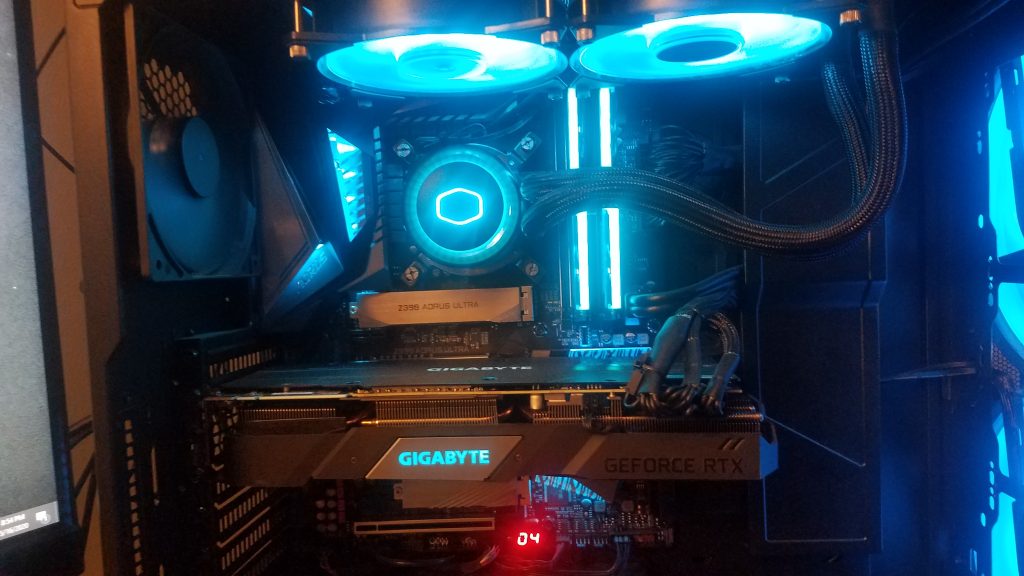
- Cooling: I went with a closed loop, water cooled, all in one unit for my CPU cooling. I wanted to be able to see all my components so I didn’t want a large heat sink with fan. This unit had good reviews, fit the case, and was RGB compatible.
- Keyboard and Mouse: I went with the Razor Chroma keyboard and DeathAddler mouse. They are by no means top of the line, but they are from a good brand, felt good, and had RGB that while it didn’t work with the rest of the components it they worked together. On a side note, the RGB can be customized down to the key, and can be interactive with key strokes, and some games are pre-programmed with the lights to be on off, or be different colors depending on skills, buff, etc.
How did it turn out?
One word, Great! This computer has performed beyond my expectations. It was easy to build and everything went together with only little hiccups. I was initially confused on how to hook up all the RGB lighting but I figured it out. Components may come with a lit of extra parts so that they can be used in a bunch of different set ups. I got tripped up thinking I had to use something that I actually didn’t need to.
If you are curious how the actually assembly goes, its pretty easy and I’ll walk you though how I did it. First I opened up all my boxes and laid the components on top. I then went one by one, installing them into the case or onto the motherboard. Some things can be installed on the motherboard before it goes into the case. These things are the CPU, the M.2 HDD, and the RAM. Next I put in the power supply and the motherboard. I routed the wires for the case (front power button, front USB, etc) and plugged them into their spots on the mother board. Most cases now have a space, if you take off the other side panel, where you can run all the wires. This creates a really clean interior of the PC giving great air flow, and it looks amazing with no wire rats nest. Finally I installed the CPU cooler, fitting the radiator to the underside top of the case, and applying thermal paste and attaching it on the CPU (word to the wise, you may need to install the cooler adapter before you put the motherboard into the case). Finally I installed the Graphics card and plugged it into its power.
Once everything is assembled, installed, and plugged in, you can hook up your monitor, mouse, and keyboard. On the first boot, hit the delete key to get to the motherboard BIOS, and tell it to boot from a USB drive. Once that is done, plug in your USB stick that has the Windows installation file (or any other operating system you are installing) restart the computer and go through the process on installing your operating system via the prompts. If there are issues start checking connections, if there are codes being thrown check on line or in the manual for what is wrong and how to fix it.
Monitor wise, I recently purchased a 1440p, 165hz, IPS panel monitor that completely rounds out this PC, the AORUS FI27Q-P. If you are going to spend the money on the good components, you need a monitor as good or better then those components as that is truly the end game. Having these great components out putting onto a 1080p 60Hz monitor is basically like buying a Ferrari and just driving it to the grocery store and back. You might as well have saved your money and bought a standard sedan that can do the same thing, other wise your just lighting money on fire for something that looks cool on your desk.
There you have it. The second Gaming PC that I have built from start to finish (in words at least). Let me know what you think!